



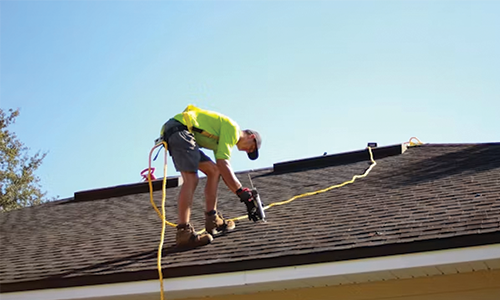
Most roofing decisions are reactive. A leak appears, a storm causes visible damage, or an inspector flags a problem during a property transaction. At that point, the choices narrow quickly and the costs climb accordingly. What gets overlooked in this cycle is the window between a roof performing well and a roof failing — a period that, when managed correctly, can add well over a decade to a roof’s functional lifespan without full replacement.
Roof restoration sits in that window. It is not a patch job, and it is not a cosmetic treatment. When done systematically, it addresses the underlying conditions that cause roofs to fail prematurely: moisture infiltration, substrate degradation, compromised fasteners, and coating breakdown. The structure of the work matters as much as the materials used. A defined, repeatable framework is what separates restoration outcomes that hold up over time from those that create a false sense of security.
This article outlines a five-step framework used in professional roof restoration practice — one that addresses both the technical sequence of the work and the decision logic behind each stage. Whether you manage commercial property, oversee a building portfolio, or are evaluating options for a significant structure, understanding this process helps you ask better questions and set realistic expectations.
Step 1: Condition Assessment and Diagnostic Mapping
A roof restoration project begins not with materials or labor, but with an accurate picture of what the roof’s current condition actually is. This phase involves a thorough inspection of the entire roof system — not just visible surface areas, but the substrate beneath, the drainage configuration, the penetrations, the fastening system, and any existing coating layers. Without this baseline, all subsequent decisions rest on assumption rather than evidence.
Professional restoration work, such as what is involved in a structured pro roof restoration process, depends on this stage being done methodically. Contractors who skip detailed diagnostics often discover mid-project that the substrate is more compromised than expected, which forces scope changes, delays, and cost overruns that erode the value of the restoration entirely.
What Diagnostic Mapping Actually Involves
Condition assessment in a professional context goes beyond a visual walkthrough. Infrared scanning is commonly used to identify moisture trapped within the roof assembly — moisture that is invisible on the surface but is actively causing substrate rot, insulation degradation, and membrane failure from below. Core samples may be taken to examine layer composition and identify how many previous repairs or coatings have been applied.
The output of this phase should be a documented map of the roof’s problem areas, ranked by severity. This is not administrative busywork. It directly determines where resources are allocated and in what sequence. A restoration that addresses surface conditions without resolving internal moisture will fail within a few seasons regardless of how well the coating is applied.
Step 2: Surface Preparation and Substrate Repair
Once the diagnostic phase is complete, the next stage involves correcting the deficiencies identified before any restoration coating or material is applied. This is the most labor-intensive part of the process and the one most frequently compressed when budget pressure is involved. That compression is also the most common reason restoration work underperforms its expected lifespan.
Surface preparation includes cleaning, which removes biological growth, debris, loose granules, and contaminants that would prevent adhesion. On commercial roofs with significant foot traffic areas or mechanical equipment, this step also involves inspecting and resetting any mechanical fasteners that have backed out or corroded. Penetrations — vents, HVAC curbs, drains, and pipe flashings — are inspected and re-sealed as part of this phase, since they represent the highest concentration of failure risk in most roof assemblies.
Why Substrate Integrity Cannot Be Deferred
The coating or membrane applied during restoration is only as durable as what it is bonded to. If the decking or insulation layer beneath has been compromised by moisture saturation, the entire assembly lacks the structural support the coating needs to perform. In these situations, a coating will look correct at installation but will begin to delaminate, blister, or crack within a relatively short period as the compromised material beneath it continues to shift and deteriorate.
Professional restoration practice treats substrate repair as a condition, not an option. Sections of decking with measurable moisture retention must be replaced before coating proceeds. This may increase upfront project cost, but it is the difference between a restoration that holds for fifteen years and one that requires remediation within three.
Step 3: Seam, Flashing, and Penetration Reinforcement
Seams, flashings, and penetrations are where most roofs fail first. They represent the points in the assembly where dissimilar materials meet, where movement occurs, and where thermal expansion and contraction create ongoing mechanical stress. In restoration work, these areas receive targeted reinforcement before any field coating is applied, because coating alone is not sufficient to seal them reliably over the long term.
Seam reinforcement typically involves embedding fabric or mesh material in a compatible sealant compound, creating a flexible, bonded joint that can accommodate movement without cracking. Flashing work around roof edges, parapets, and curbs follows a similar logic — the material must be mechanically sound and sealed in a way that accounts for how the roof moves over time, not just how it sits at the moment of installation.
The Role of Thermal Movement in Long-Term Failure
Roofs expand and contract continuously in response to temperature change. According to standards maintained by ASTM International, roofing materials and assemblies must be evaluated for their performance across a range of thermal conditions, not just static installation conditions. This matters in restoration because reinforcement materials must be selected for compatibility with the base membrane and for their ability to remain flexible under repeated thermal cycling.
A flashing repair that is rigid or incompatible with the base material may hold during mild weather but develop cracks along its edges after a few seasonal cycles. Reinforcement that accounts for movement from the start eliminates this failure mode and extends the effective life of the restoration significantly.
Step 4: Coating Application and System Sealing
With the substrate repaired and the high-risk areas reinforced, the coating phase addresses the entire roof field. This is the stage most people associate with roof restoration, but it is only effective because of what has been done before it. The coating’s job is to create a unified, seamless membrane over the existing assembly — one that reflects heat, prevents water infiltration, and slows the degradation of the materials beneath it.
Coating selection depends on the existing roof type, the building’s location, and the performance requirements of the structure. Silicone, acrylic, and polyurethane formulations each have distinct characteristics relating to moisture resistance, reflectivity, and flexibility. The decision is not aesthetic — it is driven by compatibility with the existing assembly and by the conditions the roof will be exposed to.
Application Thickness and Coverage Consistency
The durability of a coating restoration is directly tied to application consistency. Thin spots, holidays, and areas of uneven coverage create localized vulnerabilities that tend to be where the next failure originates. Professional restoration practice uses mil thickness gauges and systematic pass patterns to maintain uniform coverage across the entire field, including around obstacles and penetrations where application is more difficult.
Multiple coats are applied in most pro roof restoration systems, with each coat allowed to cure before the next is applied. This is not simply about total material volume — it is about ensuring that each layer bonds correctly and that the final assembly achieves the performance characteristics the coating system is rated for.
Step 5: Post-Installation Inspection and Long-Term Maintenance Planning
A restoration that ends at the final coat application is incomplete. The fifth step in a structured framework is verification — confirming that the work has been executed correctly and that the system is performing as intended. This involves walking the entire roof to identify any areas where coverage is insufficient, where materials have not bonded correctly, or where drainage remains compromised.
Post-installation inspection also serves as the starting point for a maintenance schedule. Roof restoration extends roof life not as a one-time intervention but as the beginning of an ongoing maintenance relationship. Periodic inspections, cleaning of drainage pathways, and early repair of any new damage are what allow the initial restoration investment to compound over time rather than erode.
Establishing a Maintenance Cadence That Actually Works
Maintenance schedules should be based on the building’s exposure conditions and the coating system’s manufacturer guidelines, not arbitrary calendar intervals. In areas with high UV exposure, seasonal temperature extremes, or significant tree cover affecting drainage, inspection frequency should reflect those realities. A well-maintained pro roof restoration system, revisited on a structured schedule, can realistically extend service life by fifteen years or more — sometimes approaching the lifespan of a full replacement at a fraction of the cost.
Buildings with documented maintenance records also perform better in insurance assessments and property valuations. The maintenance history provides evidence that the roof has been managed proactively, which reduces perceived risk for insurers and buyers alike.
Closing: Why the Framework Matters More Than the Materials
There is a tendency in roofing decisions to focus on product specifications — which coating brand, which membrane system, which warranty period. These are not irrelevant considerations, but they are secondary to the quality and completeness of the process that surrounds them. A high-performance coating applied over a compromised substrate with inadequate seam reinforcement will not perform to its rated specification. The process determines the outcome far more than the product does.
The five-step framework described here — assessment, preparation, reinforcement, coating, and post-installation verification — is not a theoretical sequence. It reflects the operational discipline that distinguishes roof restoration work that holds up over the long term from work that creates short-term confidence and long-term cost. For anyone managing a structure where roof performance has meaningful financial or operational consequences, understanding this framework is the foundation for making sound decisions about when to restore, what to expect, and how to evaluate the work being proposed.
Restoration is a viable strategy for extending roof life, controlling capital expenditure, and avoiding the disruption of full replacement. It is also a strategy that depends entirely on being executed with the right sequence, the right materials, and the right level of scrutiny at each stage. The framework exists to make that outcome predictable rather than incidental.
