



You’re standing at the kitchen window watching the rain hammer down when you notice a thick stream of water pouring down the side of the house. It’s coming from the gutter, running directly onto the brickwork.
Nobody discovers these kinds of drainage problems on a warm, dry afternoon. You always find them during the kind of weather that makes stepping outside feel like a punishment.
And by that point, the blockage has usually been building for weeks. But the warning signs are easy to spot if you know where to look, and in this post we’ll walk you through how to catch them before they turn into bigger structural damage.
How Blocked Downpipes Damage Your Walls
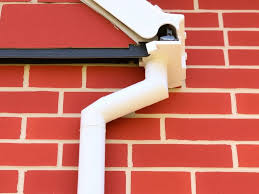
Under normal conditions, rainwater travels from the roof into the gutter, drops through the hopper into the downpipe, and drains away at ground level. The whole system is designed to keep water moving away from the building.
But when the downpipe becomes blocked, that water has nowhere to go. And in the sections below, we’ll cover exactly what happens to your walls, masonry, and interior when it starts pooling where it shouldn’t.
Water Spills Over the Hopper and Runs Down the Wall
Leaves, moss, twigs, and roof silt can all build up inside the downpipe or around the hopper opening. During light rain, you probably won’t notice anything unusual. The flow will be thin enough to trickle through whatever gap remains.
Heavy rain is a different story. The volume of water can be overwhelming to your restricted pipe, so it’ll back up behind the blockage and spill over the top of the hopper or the gutter edge.
That overflow will then run directly down the exterior wall. And because the problem only shows during a downpour, it’ll disappear the moment the weather clears up, making it very easy to forget about until the next storm.
Moisture Soaks Into the Brickwork
If water keeps running down the same stretch of wall every time it rains, that repeated exposure will start to cause problems beneath the surface.
Brick and mortar are both porous. A single soaking won’t do much harm, but weeks or months of repeated exposure without enough drying time in between will allow moisture to gradually seep deeper into the masonry.
Older properties across the UK are particularly exposed here. Victorian and Edwardian homes with ageing lime mortar, eroded pointing, or hairline cracks in the brickwork will let water in faster than a modern cavity wall ever would.
Damp Patches Appear on Interior Walls
Once enough moisture has made its way through the wall, you’ll start seeing the telltale signs of it indoors. Damp patches, peeling paint, bubbling wallpaper, and dark discolouration are all common signs of moisture seeping in from outside.
The position of these patches is the biggest clue. If it lines up with the blocked downpipe on the outside, you’re very likely looking at rainwater ingress through the saturated masonry.
This is worth knowing because damp patches get blamed on condensation or rising damp by default. Sometimes, the actual cause is a two-quid blockage in the guttering that nobody has checked for months.
Mould in Damp Areas
Mould will follow damp if the conditions are right. A wall that stays wet for long enough in a room with poor ventilation will give mould exactly what it needs to thrive and take hold.
You can scrub it off, and it will come back. You can spray it with anti-mould treatment, and it will come back. If water is still getting into the wall from a blocked downpipe outside, wiping away that mould is like mowing over weeds without pulling up the roots.
The only way to stop it for good is to stop the moisture at its source.
Render, Mortar, and Masonry Deterioration
Left unchecked over several months, as the masonry repeatedly gets drenched, the moisture will start to ruin the exterior paint and render.
If water keeps running down the same stretch of wall for long enough, the render will start cracking and lifting away, and the mortar between your bricks will go soft enough that you can poke it out with your finger.
Your paintwork will also blister and peel. And during a cold UK winter, any water trapped inside cracks or porous stone can expand the damage further through those repeated freeze-thaw cycles.
What could have been a ten-minute job with a ladder and a pair of gloves can end up costing you hundreds in repointing, render patches, and repainting the spare bedroom. You’ll wish you’d just checked the downpipe back in October.
How to Spot the Problem Early
Most of these warning signs are easy to spot once you know what to look for. The challenge is that they’re easiest to spot during rainfall, which is precisely when nobody wants to stand in their garden staring upwards at the guttering.
But a quick glance during the next downpour will tell you a lot. Look for water spilling from the hopper or gutter, visible debris around the downpipe opening, or water running down one section of the wall when the rest stays dry.
After that, check the brickwork. If one patch stays noticeably damper than the surrounding area, or if you can see staining or discolouration beneath the downpipe, you’ve found the problem.
On the inside, a damp mark, peeling paint, or recurring mould on the same wall is worth investigating before you assume it’s condensation or a general ventilation issue. So, walk outside, look up, and see whether the downpipe above that spot is flowing properly.
Clearing the Blockage and Preventing Future Damage
The first priority is to stop the overflow. If the hopper or the top of the downpipe has visible debris that you can reach safely from ground level, clearing it may be enough to restore the flow.
But blockages that sit deep inside the pipe, or downpipes on upper storeys and awkward rooflines, are better handled by someone with the right equipment.
If you’re looking for professional gutter cleaning, Chiswick specialists will clear the obstruction and check the full run of pipework for damage or misalignment in a single visit.
Once the immediate problem is sorted, prevention is the next step. Make sure to have your gutters and downpipes checked at least once a year, ideally in late autumn after the bulk of the leaf fall.
Clear any visible debris from hopper openings before it has a chance to compact. And after heavy storms, check that the water is actually flowing out at the base of the downpipe and into the drain.
If the same blockage keeps returning, there may be a deeper issue such as a cracked joint, a sagging section of pipe, or root intrusion at ground level.
Remember that any wall sections that have been affected by prolonged damp will need time to dry thoroughly before you redecorate or repair the interior finishes. Painting over a damp wall will only trap the moisture and bring you back to square one.
Conclusion
There you have it. A ladder, a pair of gloves, and twenty minutes on a dry afternoon are all it takes to stop your walls from soaking up every downpour this winter.
So get up there, clear the blockage, and enjoy the next rainstorm from the sofa with a cup of tea instead of a torch and a growing sense of dread.
