



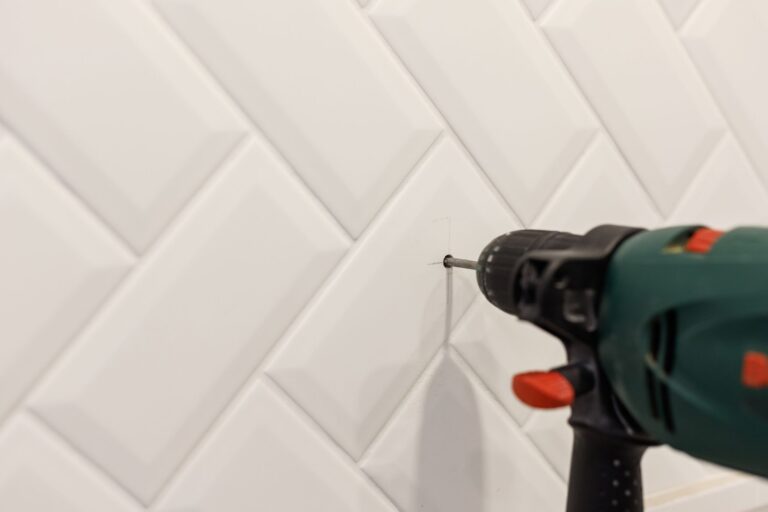
Porcelain tile has become one of the most widely used surface materials in American homes, appearing in kitchens, bathrooms, mudrooms, and outdoor patios. It holds up well under foot traffic, resists moisture, and maintains its appearance over years of use. But those same qualities that make porcelain durable create a significant challenge the moment a homeowner needs to drill through it. Unlike ceramic or natural stone, porcelain is fired at extremely high temperatures, which compresses the material into a surface that is both brittle and exceptionally hard. A single drilling mistake can produce a crack that travels across a grout line, or worse, fractures the tile entirely.
For homeowners undertaking renovation work, installing fixtures, mounting shelving, or running plumbing through tiled walls, the ability to drill clean holes through porcelain without damage is a practical necessity. It affects the quality of the finished result, the time spent on the job, and whether replacement tile needs to be sourced after the fact. Understanding the mechanics of why porcelain cracks during drilling — and how the right approach prevents it — makes the difference between a clean installation and a costly repair.
Why the Right Drill Bit Makes Everything Else Work
Most drilling failures on porcelain tile happen before the homeowner even starts the work. They happen at the point of tool selection. Porcelain’s density means that standard masonry bits, which work on brick, concrete block, and ceramic tile, generate too much friction and heat against the surface. That heat builds up quickly, weakens the material structure at the drill point, and causes the tile to crack from stress rather than cut cleanly. The bit itself often dulls within seconds on harder porcelain, which compounds the problem by requiring more pressure to maintain progress — increasing both heat and vibration.
The appropriate tool for this application is a diamond core tile drill bit. A properly selected diamond core tile drill bit uses industrial-grade diamond particles bonded to the cutting edge, which abrades through the tile rather than chipping it. This abrasive cutting action produces far less lateral stress on the surrounding tile surface, which is the primary reason cracks form when wrong bits are used. The core design also allows heat to dissipate more evenly, and water cooling can be applied through or around the bit to maintain temperature during the cut.
Understanding the Difference Between Tile Types and Why It Matters for Bit Selection
Not all tile presents the same drilling challenge. Ceramic tile is softer and more porous, meaning it responds adequately to less aggressive tooling. Porcelain, by contrast, has a water absorption rate below half a percent, which is a practical indicator of how tightly its material structure is compressed. Natural stone tiles like marble or travertine have their own structural characteristics — they are harder than ceramic but often softer than full-body porcelain, and they fracture differently along natural grain lines.
Selecting a drill bit rated specifically for porcelain, rather than a general-purpose tile bit, ensures the cutting edge is matched to the material’s hardness. Using a bit designed for softer ceramic on porcelain results in rapid wear, slipping, and inconsistent hole quality. In practical terms, homeowners working with large-format porcelain tiles — which are increasingly common in modern renovation projects — need bits that maintain consistent abrasion across a wider diameter without overheating.
Preparing the Work Surface Before Drilling Begins
Surface preparation before drilling is where most homeowners lose time they later spend on repairs. Porcelain tile is smooth, and a drill bit placed on an unprotected smooth surface will skip across it before it has a chance to establish a contact point. This skipping creates surface scratches and can introduce stress fractures in the glaze before any real cutting begins. Controlling the entry point is the first physical step in the process.
Securing the Starting Point and Managing Bit Drift
A simple masking tape application over the drill site gives the bit initial grip on the surface, reducing lateral movement before the cutting edge seats itself. Some homeowners use a small guide — a piece of scrap wood with a pre-drilled hole of the correct diameter — pressed against the tile surface to hold the bit in position during the entry phase. Both approaches address the same underlying problem: the bit needs a few seconds of controlled contact before it can begin productive cutting.
Drill press attachments designed for handheld drills are also available for this purpose. They allow the homeowner to apply consistent downward pressure at a controlled angle, which prevents the bit from wandering. For wall applications, where gravity is not assisting with pressure, this kind of guide becomes more practically useful. The goal in all cases is to allow the bit to establish its own seat before full pressure is applied.
Controlling Speed, Pressure, and Heat During the Cut
Once the bit is seated and cutting has begun, the two variables that most directly determine outcome are rotational speed and the heat that speed generates. Diamond core bits designed for tile work better at lower RPMs than most homeowners initially expect. High speed increases surface temperature faster than the material can absorb it, which is what causes thermal cracking in dense tile. A slower, steady cutting speed allows the abrasive action to do its work without building the heat spikes that compromise the surrounding material.
The Role of Water Cooling in Extending Both the Cut and the Bit
Water acts as a coolant during the cutting process, and its use significantly extends the life of the diamond core tile drill bit while also improving hole quality. For floor tile work, a small ring of plumber’s putty or modeling clay around the drill site can hold a few tablespoons of water in place directly over the cutting point. For wall work, a wet sponge held above the drill site with a helper, or a purpose-built water feed attachment, accomplishes the same function.
The cooling effect here is not optional for dense porcelain. Without water, even high-quality diamond bits will begin to lose abrasive effectiveness within a single drilling operation on harder tile. The diamond particles themselves rely on a bonding matrix that degrades under sustained heat. Keeping that matrix cool preserves cutting performance across the full depth of the hole and across multiple holes in a single session.
Applying Consistent Pressure Without Forcing the Cut
The temptation when progress slows is to increase downward pressure. On porcelain, this is counterproductive. Increased pressure pushes heat into a smaller contact area, dulls the cutting edge faster, and transmits vibration through the tile into the grout lines and substrate below. The correct response when cutting slows is to ease off pressure slightly, allow the coolant to reach the cutting edge, and re-establish a consistent, moderate feed rate.
As the Occupational Safety and Health Administration notes in its power tool guidance, consistent pressure and controlled feed rates are fundamental to safe and effective use of abrasive tooling — principles that apply directly to drilling dense tile materials where tool movement is confined and operator feedback is limited.
Drilling Into Tile That Is Already Installed Over Substrate
Tile that has been installed over a cement board substrate, a concrete slab, or a wooden subfloor presents a second drilling phase once the tile surface has been penetrated. Each layer of substrate material behaves differently, and the bit selection for the tile phase may not be optimal for the substrate phase. A diamond core drill bit will pass through thin-set adhesive and cement board, but it is not designed for sustained use in concrete or masonry at depth.
Transitioning Between Materials Without Damaging the Tile Entry Point
One common error is continuing with the tile bit into harder substrate materials, which generates vibration that travels back up through the hole and stresses the tile from below. Once the tile layer has been cleared, switching to a masonry bit of the same diameter for continued depth drilling reduces vibration and preserves the clean entry hole made by the diamond bit. This transition requires withdrawing the first bit, clearing debris from the hole, and re-entering with the second tool — a step that adds a minute or two but prevents the kind of cracking that comes from using the wrong tool on the wrong material.
Common Mistakes That Lead to Cracked Tiles
Even with the right tools and general awareness of the process, specific errors account for the majority of cracked tiles during drilling work. These are not random failures — they follow predictable patterns.
- Using a hammer drill setting on porcelain tile introduces percussive impact that shatters rather than abrades the material, even when a diamond bit is in use. Hammer function must be turned off when drilling tile.
- Drilling at too steep an angle during entry creates uneven pressure on the bit edge, which deflects it laterally and scores the tile surface before full contact is established.
- Skipping the cooling step entirely on harder porcelain formats leads to thermal fractures that appear not during drilling but after the bit is withdrawn, as the tile returns to ambient temperature unevenly.
- Failing to support large-format tiles adequately from behind allows the tile to flex under drilling pressure, producing cracks along the unsupported area rather than at the drill site itself.
- Reusing a worn diamond core tile drill bit on a new installation produces inconsistent results regardless of technique, because the abrasive edge no longer provides clean contact with the surface.
Finishing the Hole and Inspecting the Work
Once the full depth of the hole has been achieved, withdrawing the bit slowly and evenly prevents the cutting edge from catching on the hole perimeter during extraction. A quick inspection of the hole edge will confirm whether the cut is clean or whether any micro-fractures have appeared in the glaze. Small chips at the very edge of the hole are common and are typically concealed by the fixture plate, flange, or fitting being installed. Cracks that extend beyond the immediate drill site indicate either tool, technique, or substrate support issues that should be assessed before continuing.
Cleaning debris from the hole with a dry brush before inserting anchors or fittings ensures that the anchor seats properly against the substrate material rather than against loose grit that can shift under load. For plumbing penetrations or large-diameter holes, a quick check of the grout lines radiating from the drill site confirms that no stress has transferred beyond the cut area.
Conclusion
Drilling through porcelain tile cleanly is not a matter of brute force or specialized knowledge that only professionals can access. It is a matter of matching the tool to the material, controlling the physical variables that cause failure, and working at a pace that allows the process to function correctly. Porcelain’s hardness is exactly why it lasts — and that same hardness requires a disciplined approach during any drilling work.
For US homeowners taking on bathroom renovations, kitchen updates, or any project that requires penetrating an installed porcelain surface, the investment in the correct bit and a few minutes of preparation prevents the most common and costly outcome in this type of work: a cracked tile that requires replacement. The process itself is straightforward once the mechanics are understood. The discipline is in not skipping steps when the work feels routine.
